

Build Windows applications with Flutter on a Linux machine
Use a Windows Virtual Machine on Linux or any host operating system to develop and distribute Windows applications.
Introduction
Flutter is an open-source framework suitable for developing applications for multiple platforms. You can install it on your operating system of choice for developing web, mobile, and desktop applications; however, you cannot build your applications for all the supported platforms using a single operating system.
I've been using Linux Operating System as my primary development environment, mainly because of its power and flexibility. However, I can't build Windows applications using Flutter on my Linux machine since it requires Visual Studio 2019 for Windows desktop development with C++. However, there is an effective solution available. In this article, I will explain how to set up all the requirements of Flutter on a Windows Virtual Machine to compile an application targeting the Windows operating system.
Create a Virtual Machine
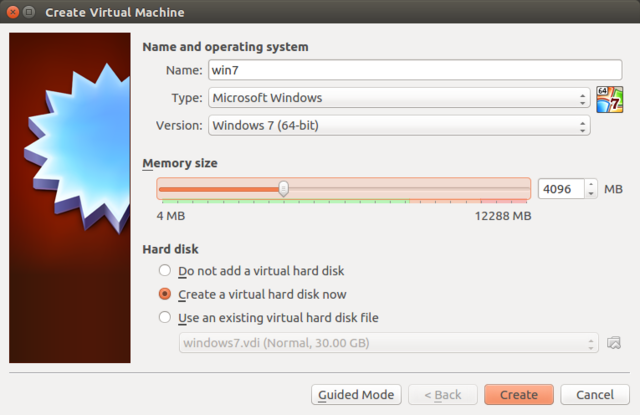
VirtualBox enables you to create a virtual machine (VM) on Linux. The first step is to download and install it on your current operating system. After the installation is complete, open VirtualBox and choose "New" to create a new VM.
Provide a name for your VM, select "Windows 7" as your operating system, and set the memory size as you need. If you don't have an existing virtual hard disk, select "Create a virtual hard disk now."
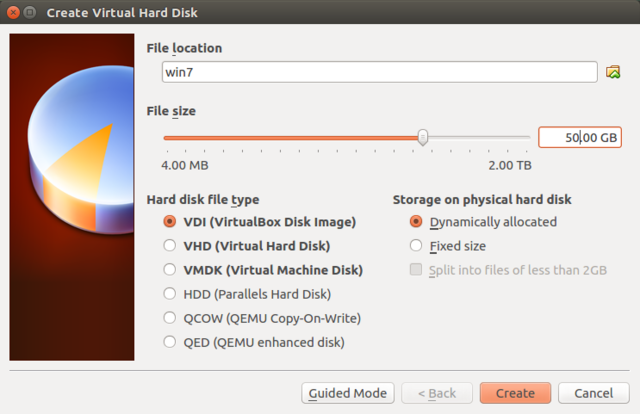
You are required to have at least 30GB of storage on your virtual hard disk. You can choose between a Dynamically Allocated or a Fixed Size virtual hard disk. The Dynamically Allocated type initially takes a limited amount of physical disk space and gradually grows in size as you use your virtual machine. Hence this is a proper choice if the disk space on your system is limited. The Fixed Size type creates a file with the specified size on your physical disk beforehand, and it is much faster than the first type.
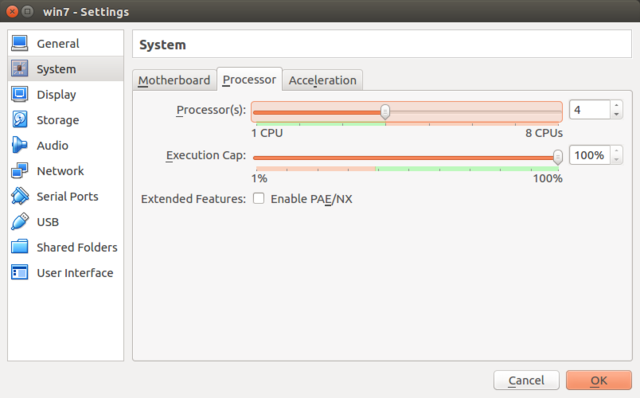
If your host system has multiple CPUs, you can allocate more than one processor to operate your VM. It is better not to exceed the maximum number of recommended processors, in my case, 4 CPUs.
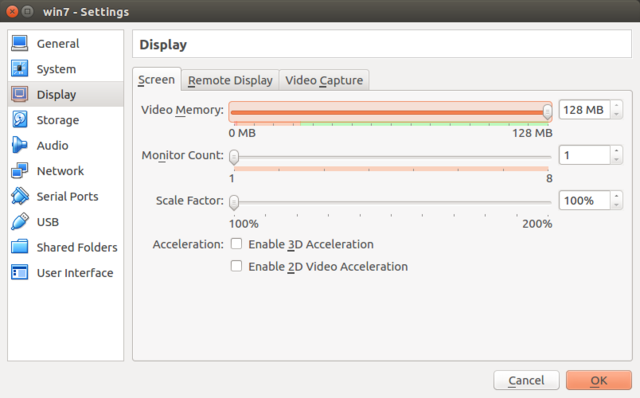
It is recommended to increase the video memory size to the maximum value for improving guest machine performance.
Your created guest virtual machine is like real hardware with all parts configurable. To install an operating system on this machine, you can mount Windows Installation DVD/USB or an ISO image file.
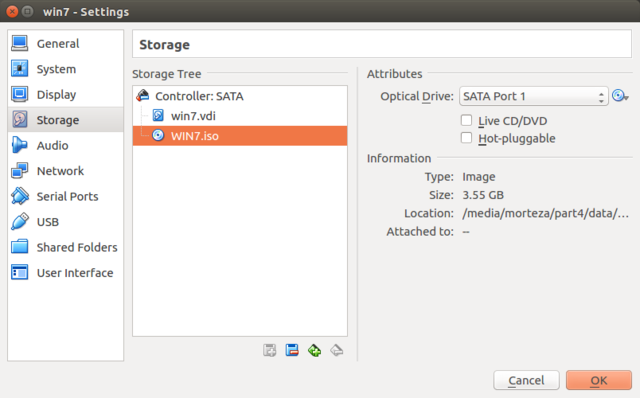
You can mount some shared spaces to be accessed by both the host and the guest machine, as this is a more convenient method of sharing storage resources between two operating systems. However, some limitations might occur due to the file system inconsistencies between different types of operating systems.

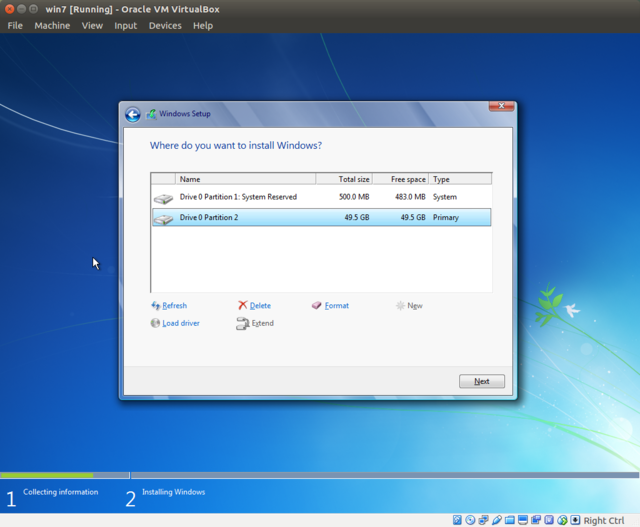
During the initial steps of the Windows installation, you can select the only drive available on the guest machine and create a single partition. Here, Windows 7 automatically creates a System Reserved and a single primary partition. Select the primary partition for OS installation.
Continue with the remaining configurations until the Windows installation is initiated. The installation process takes some time based on the type of hardware you have.
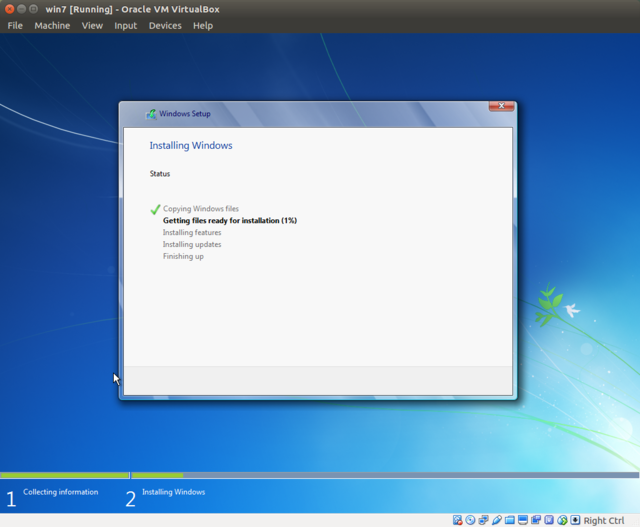
During the installation, your guest machine will restart multiple times. Do not press any keys if it asks, or the process will be started from the beginning. You can unmount the ISO image file when the installation is finished successfully.
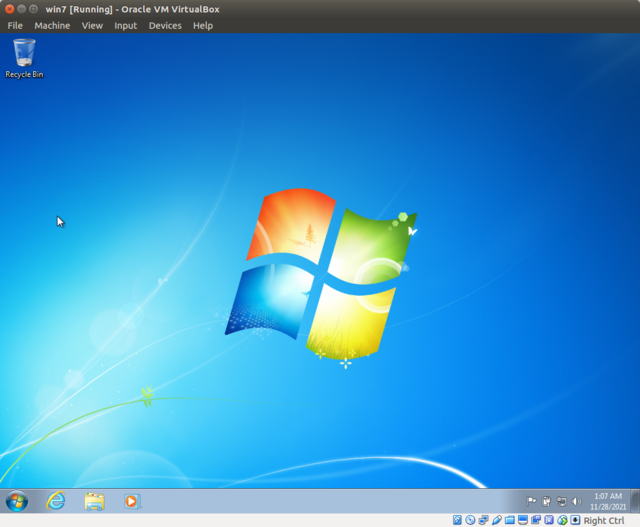
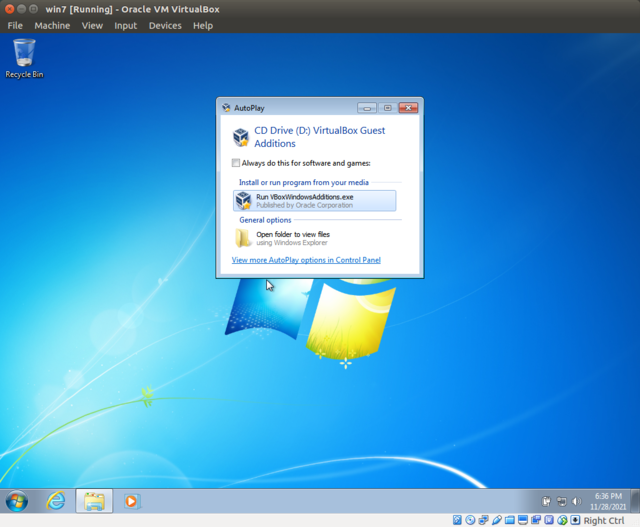
Open menu "Devices" and select "Insert Guest Additions CD Image..." to mount VirtualBox Guest Additions 5.1.18, then run it. After it is finished, you should reboot your guest machine for all the changes to take effect. Now, you will be able to change the size of the guest machine's window on your host operating system.
Update Windows PowerShell
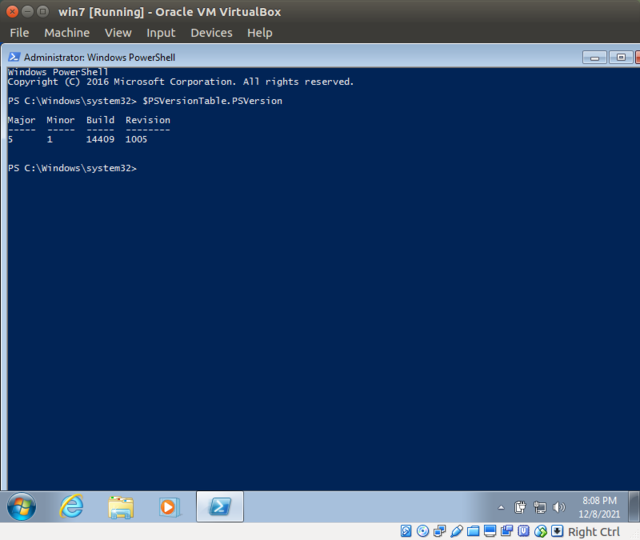
Check the version of the currently installed PowerShell (PS) on your Windows 7 by running Windows PowerShell from the start menu and entering the following command:
1PS C:\Users\win7> $PSVersionTable.PSVersion
2
3Major  Minor  Build  Revision
4-----  -----  -----  --------
52      0      -1     -11PS C:\Users\win7> $PSVersionTable.PSVersion
2
3Major  Minor  Build  Revision
4-----  -----  -----  --------
52      0      -1     -1
Flutter depends on Windows Powershell 5.0 or higher, so we have to update it now. After downloading Windows Powershell 5.1 and extracting Win7AndW2K8R2-KB3191566-x64.zip file, run existing PS in administrator mode and disable ExecutionPolicy before executing Install-WMF5.1 script:
1PS C:\Users\win7\Downloads\Win7AndW2k8R2-KB3191566-x64> Set-ExecutionPolicy Bypass
2PS C:\Users\win7\Downloads\Win7AndW2k8R2-KB3191566-x64> powershell.exe -F .\Install-WMF5.1.ps11PS C:\Users\win7\Downloads\Win7AndW2k8R2-KB3191566-x64> Set-ExecutionPolicy Bypass
2PS C:\Users\win7\Downloads\Win7AndW2k8R2-KB3191566-x64> powershell.exe -F .\Install-WMF5.1.ps1
After a mandatory system restart, verify the current PS version again for confirmation.
Install Git
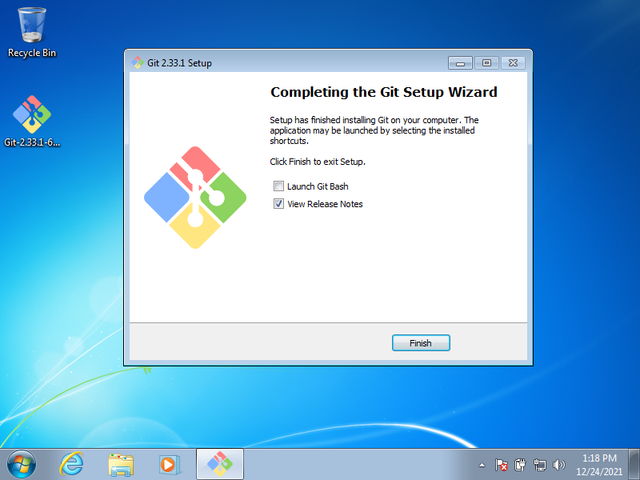
Download and install Git 64-bit for Windows. You should be able to run git commands from PS after the installation is complete.
Install Visual Studio 2019
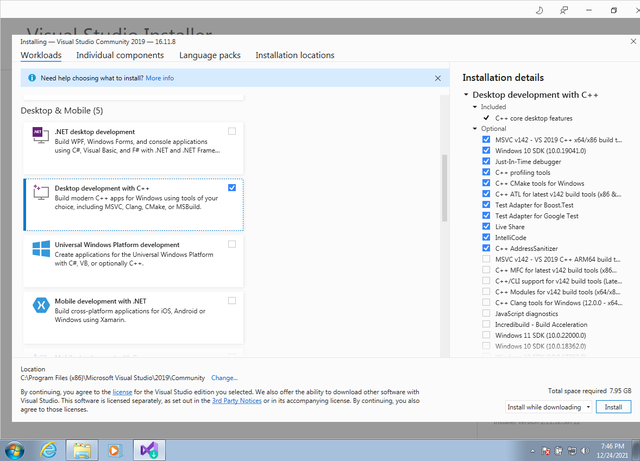
To create Windows applications using Flutter, you should have Visual Studio 2019 Community on your system.

For Win32, you need the "Desktop development with C++" workload installed, including all of its default components. For UWP, you need the "Universal Windows Platform development" workload installed with the optional UWP C++ tools.
Install Flutter
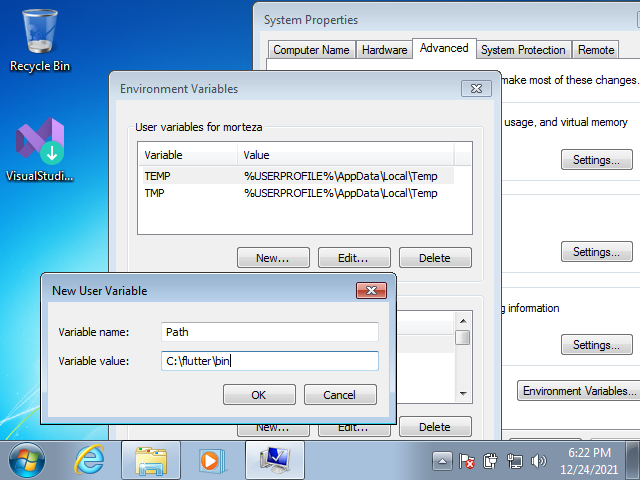
Now is the time to set up Flutter on your VM. Download flutter_windows_2.5.3-stable.zip and extract the content of the archive to C:\flutter. Then, search for env in Windows and add Path as a user environment variable with the C:\flutter\bin value. It enables you to call Flutter from any path in PS.
Enable Desktop Support
Open a PS and modify Flutter configuration to enable Windows Desktop support.
1PS C:\> flutter config --enable-windows-desktop1PS C:\> flutter config --enable-windows-desktop
For Universal Windows Platform (UWP) applications, use the following commands:
1PS C:\> flutter channel dev
2PS C:\> flutter upgrade
3PS C:\> flutter config --enable-windows-uwp-desktop1PS C:\> flutter channel dev
2PS C:\> flutter upgrade
3PS C:\> flutter config --enable-windows-uwp-desktop
Build an Application
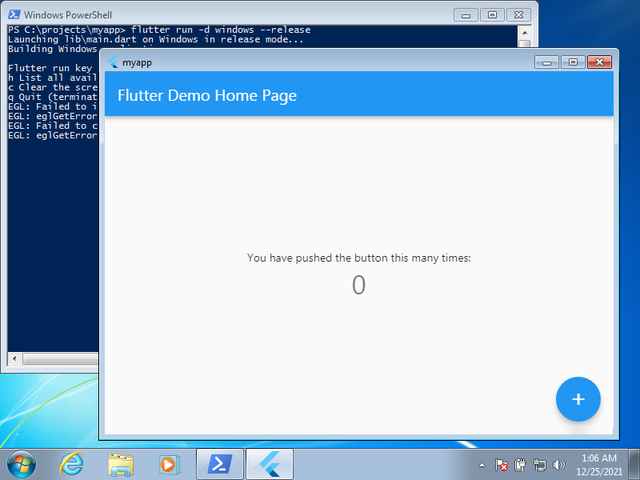
To create a new Flutter application, open a PS and call the flutter create command. After the application is created, build and release it for the Windows platform.
1PS C:\projects> flutter create myapp
2PS C:\projects\myapp> cd myapp
3PS C:\projects\myapp> flutter run -d windows --release1PS C:\projects> flutter create myapp
2PS C:\projects\myapp> cd myapp
3PS C:\projects\myapp> flutter run -d windows --release
Distribute as a Zip File
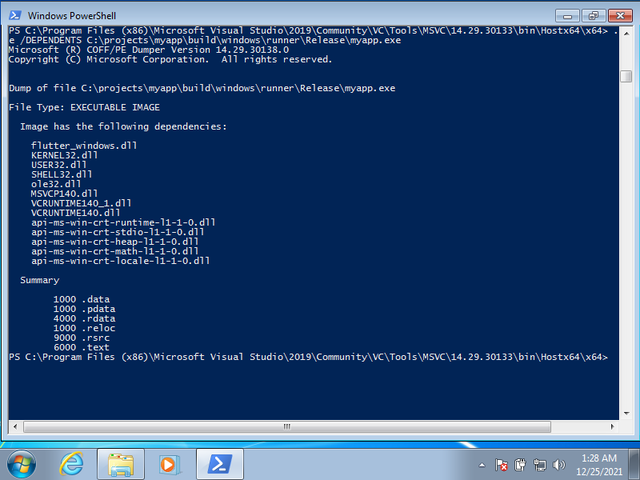
The most efficient way of finding dependencies of an executable file in Windows is using dumpbin.exe from Microsoft Visual Studio tools. This program is able to list all the dll files required for the Flutter application to run on Windows properly.
1PS C:\> cd C:\Program Files (x86)\Microsoft Visual Studio\2019\Community\VC\Tools\MSVC\14.29.30133\bin\Hostx64\x64
2PS C:\Program Files (x86)\Microsoft Visual Studio\2019\Community\VC\Tools\MSVC\14.29.30133\bin\Hostx64\x64> dumpbin.exe /dependents C:\projects\myapp\build\windows\runner\Release\myapp.exe
3
4flutter_windows.dll
5KERNEL32.dll
6USER32.dll
7SHELL32.dll
8ole32.dll
9MSVCP140.dll
10VCRUNTIME140_1.dll
11VCRUNTIME140.dll
12api-ms-win-crt-runtime-l1-1-0.dll
13api-ms-win-crt-stdio-l1-1-0.dll
14api-ms-win-crt-heap-l1-1-0.dll
15api-ms-win-crt-math-l1-1-0.dll
16api-ms-win-crt-locale-l1-1-0.dll1PS C:\> cd C:\Program Files (x86)\Microsoft Visual Studio\2019\Community\VC\Tools\MSVC\14.29.30133\bin\Hostx64\x64
2PS C:\Program Files (x86)\Microsoft Visual Studio\2019\Community\VC\Tools\MSVC\14.29.30133\bin\Hostx64\x64> dumpbin.exe /dependents C:\projects\myapp\build\windows\runner\Release\myapp.exe
3
4flutter_windows.dll
5KERNEL32.dll
6USER32.dll
7SHELL32.dll
8ole32.dll
9MSVCP140.dll
10VCRUNTIME140_1.dll
11VCRUNTIME140.dll
12api-ms-win-crt-runtime-l1-1-0.dll
13api-ms-win-crt-stdio-l1-1-0.dll
14api-ms-win-crt-heap-l1-1-0.dll
15api-ms-win-crt-math-l1-1-0.dll
16api-ms-win-crt-locale-l1-1-0.dll
Locate these files in the C:\Windows\System32 folder and copy them into the Release folder. The following files are required to be included in the root directory of the myapp.exe executable file. You can ignore the rest.
1flutter_windows.dll
2msvcp140.dll
3myapp.exe
4vcruntime140.dll
5vcruntime140_1.dll1flutter_windows.dll
2msvcp140.dll
3myapp.exe
4vcruntime140.dll
5vcruntime140_1.dll
And finally, after acquiring all the required dependencies, make a zip archive out of the application's folder for distribution.