

Deploy static Next.js websites on GitHub Pages
Use Next.js to develop and export a static HTML version of a website to be hosted on GitHub Pages.
Introduction
Next.js is a modern JavaScript framework that offers server-side rendering (SSR) and static site generation (SSG) features. Using SSG with Next.js, you will be able to create a static HTML version of your website at the build time and deploy it on any webserver (i.e., GitHub Pages and Actions) you like. The main advantage of this feature is that it makes the page loading process extremely fast for the viewers. In this article, I will explain how to create a static website with the SSG feature of the Next.js framework and deploy it on GitHub Pages.
Create an Application
The first step is to create a Next.js application based on the blog-starter kit available among the provided examples. After creating the application, navigate to the project directory and start the development server on port 3333.
1$ npx create-next-app mywebsite --use-npm --example "https://github.com/vercel/next-learn-starter/tree/master/learn-starter"
2$ cd mywebsite
3$ npx next dev --port 33331$ npx create-next-app mywebsite --use-npm --example "https://github.com/vercel/next-learn-starter/tree/master/learn-starter"
2$ cd mywebsite
3$ npx next dev --port 3333
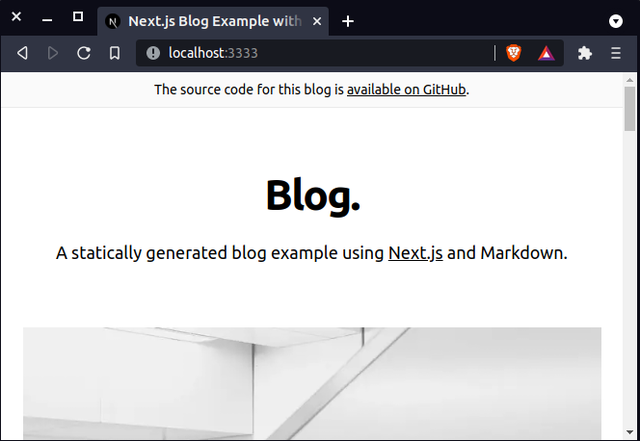
Open your browser and visit localhost:3333. You should be able to see the following page.
Generate a Static Site
Modify the source code of this website based on your need. You can start by editing the website's home page, located in the pages/index.js file. However, remember that the export command used for generating static pages does not support the next/image component as this component relies on Image Optimization API. One solution is to use the <img> HTML tag or the next-optimized-images package instead of next/image. Besides, internationalized (i18n) routing is not compatible with exported pages either because it uses dynamic routing internally for implementation. The next-export-i18n package is a suitable alternative.
To build and export your application to the ./dist directory, use the following commands:
1$ npx next build
2$ npx next export -o dist/1$ npx next build
2$ npx next export -o dist/
Test on Nginx
After exporting a static HTML version of your application, you can test it locally using the Nginx webserver. First, you need to update the package list and install Nginx with these commands:
1$ sudo apt update
2$ sudo apt install nginx1$ sudo apt update
2$ sudo apt install nginx
The Nginx service will start automatically after a successful installation. Check if the nginx.service is active and running:
1$ sudo systemctl status nginx1$ sudo systemctl status nginx
You can point your browser to the localhost address. The following page should appear in your browser.

For testing purposes, you can now deploy your static website locally using the Nginx webserver. Just copy the dist directory, which contains your generated static website, to the /var/www path.
1$ cd /path/to/project
2$ sudo cp dist/ /var/www1$ cd /path/to/project
2$ sudo cp dist/ /var/www
In order to make your website accessible through localhost:3000, you need to set up a virtual host inside the Nginx webserver.
1$ cd /etc/nginx/sites-available
2$ sudo touch dist
3$ vim dist1$ cd /etc/nginx/sites-available
2$ sudo touch dist
3$ vim dist
1server {
2  listen 3000;
3  listen [::]:3000;
4  server_name dist.example.com;
5  root /var/www/dist;
6  index index.html;
7  location / {
8    try_files $uri $uri/ =404;
9  }
10}1server {
2  listen 3000;
3  listen [::]:3000;
4  server_name dist.example.com;
5  root /var/www/dist;
6  index index.html;
7  location / {
8    try_files $uri $uri/ =404;
9  }
10}
Enable the virtual host that you've just created by creating a symbolic link inside the sites-enabled directory.
1$ cd /etc/nginx/sites-enabled
2$ sudo ln -s /etc/nginx/sites-available/dist dist1$ cd /etc/nginx/sites-enabled
2$ sudo ln -s /etc/nginx/sites-available/dist dist
Restart Nginx to make the changes take effect.
1$ sudo systemctl restart nginx1$ sudo systemctl restart nginx
You can access the website by pointing your browser to the localhost:3000 address.
Push to GitHub
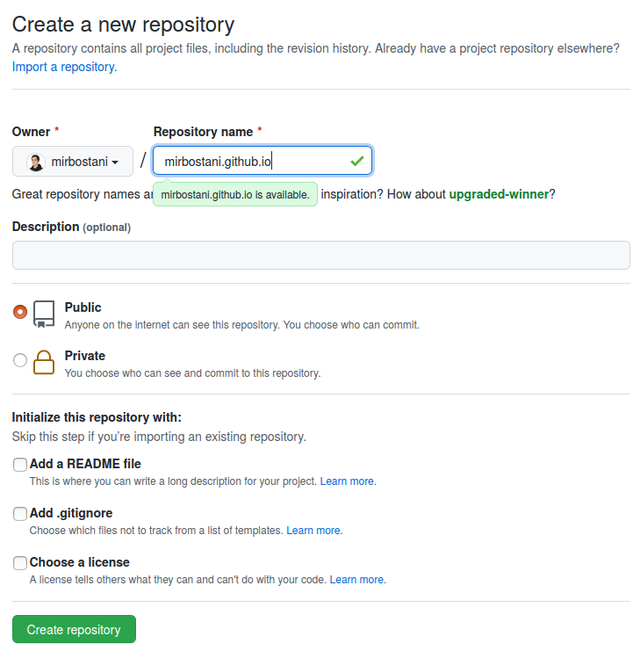
GitHub allows you to host a static webpage from your repository using GitHub Pages. So, create a repository with the <yourusername>.github.io structure and substitute <yourusername> with your GitHub username.
Create a local repository and merge it with your remote one.
1$ mkdir mirbostani.github.io
2$ cd mirbostani.github.io
3$ git init
4$ git branch -M main
5$ git remote add origin https://github.com/mirbostani/mirbostani.github.io.git1$ mkdir mirbostani.github.io
2$ cd mirbostani.github.io
3$ git init
4$ git branch -M main
5$ git remote add origin https://github.com/mirbostani/mirbostani.github.io.git
Now, move the content of the dist directory to your local repository. If you want to host your website on GitHub Pages, you should create an empty file called .nojekyll to prevent GitHub Pages to use Jekyll by default. The last step is to commit and push your repository to be online.
1$ cp -r /path/to/mywebsite/dist /path/to/mirbostani.github.io
2$ cd /path/to/mirbostani.github.io
3$ touch .nojekyll
4$ git add .
5$ git commit -m "Initial commit"
6$ git push1$ cp -r /path/to/mywebsite/dist /path/to/mirbostani.github.io
2$ cd /path/to/mirbostani.github.io
3$ touch .nojekyll
4$ git add .
5$ git commit -m "Initial commit"
6$ git push
If you don't have a custom domain and want to use your GitHub repository name, you should prefix the asset links by modifying the next.config.js file. Then, redo the exporting and pushing process.
1const isProd = process.env.NODE_ENV === "production"
2
3module.exports = {
4  assetPrefix: isProd ? "/<your-repo-name>/" : "",
5}1const isProd = process.env.NODE_ENV === "production"
2
3module.exports = {
4  assetPrefix: isProd ? "/<your-repo-name>/" : "",
5}
Finally, you can visit your website on <yourusername>.github.io. It should be up and running.